How to unmat hair extension at the root

Best to unmat hair extension at the root

How to Unmat Hair Extension At the Root

Best to unmat hair extension at the root  Knowing how to safely unmat hair extensions is critical for maintaining them and your natural hair.  Knowing the right techniques can help prevent harm and ensure a seamless removal process, whether you are dealing with clip-in, tape-in, or fusion extensions.

In this guide, we’ll discover sensible steps and tips for unmuting your hair extensions at the foundation, leaving your hair looking stunning and healthful.

Understanding Hair Extension Matting

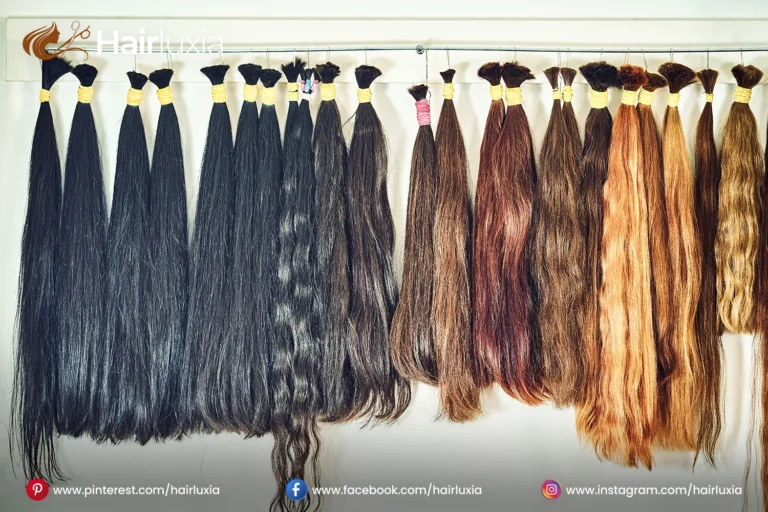
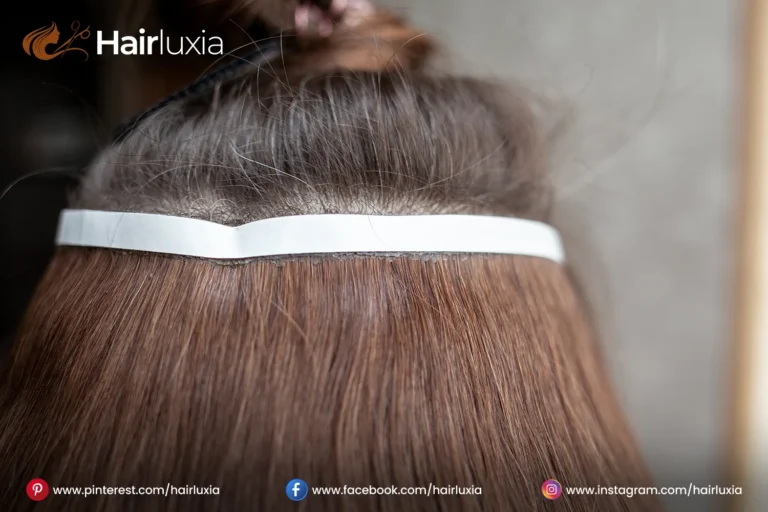
Hair extension matting refers to the tangling or knotting of hair extensions, frequently occurring at the basis or where the extensions are connected to the natural hair.  This difficulty can arise for numerous motives, along with:

1. Improper Maintenance: Unmat hair extension Failure to comb or take care of the extensions frequently can bring about tangles and knots.

2. Product Buildup: The use of heavy styling merchandise can motive residue to build up, making it more difficult to detangle the hair.

3. Moisture and Humidity: High humidity degrees can purpose hair to swell and become frizzy, increasing the probability of matting.

4. Sleeping Habits: Rubbing against pillows or bedding, even even as sleeping, can purpose friction, main to tangling.

5. Physical Activity: Unmat hair extension Activities that contain motion can create friction, causing hair to tangle.

6. Incorrect Application: If extensions are carried out too tightly or incorrectly, they may come to be matted greater without troubles.

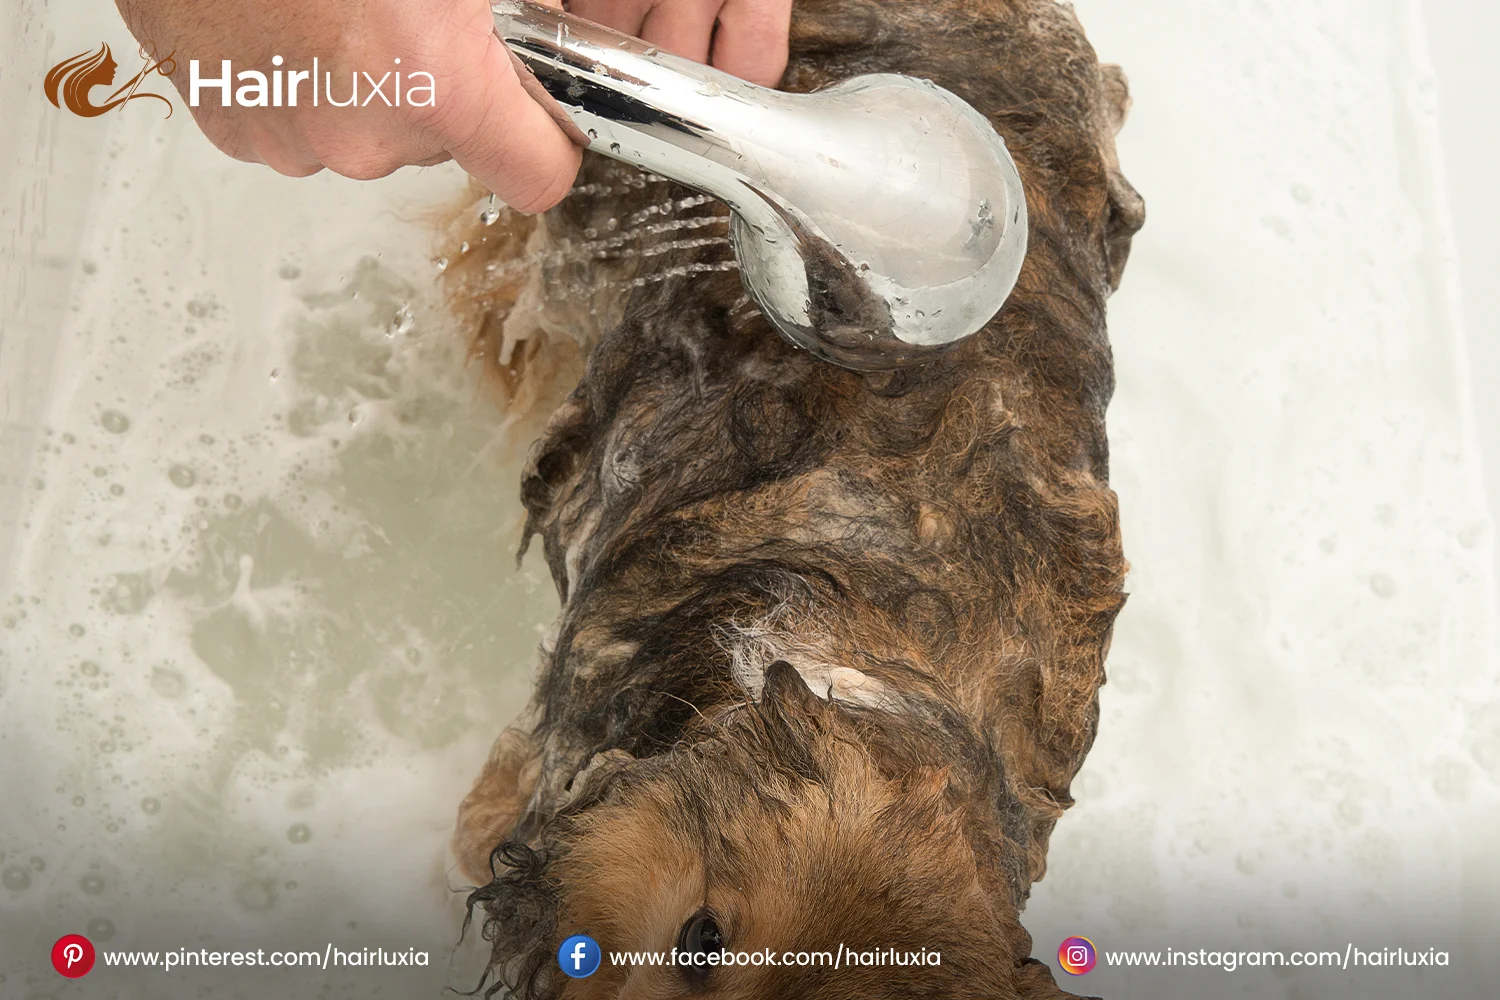
7. Swimming: Exposure to chlorine or salt water can dry out hair extensions, making them greater vulnerable to tangling and matting at the roots.

8. Infrequent Washing: Over time, dust, oil, and product buildup can collect, main to matting. Regular washing with suitable merchandise is vital for maintaining wholesome extensions.

Matting can be frustrating, but it can often be resolved with proper care and techniques, allowing you to preserve the integrity of your hair extensions and herbal hair.

Signs of Matting Hair At the Beginning

Recognizing the signs of matting at the root of hair extensions is vital for timely intervention.  One of the first indicators is the problem of brushing or combing through the origins, regularly observed via significant tugging or pulling.

Signs of matting hair at the beginning

You may also examine clumps or knots forming close to the bottom of the extensions, which could cause a difficult texture.  Additionally, if you notice a boom in shedding when attempting to style or manage your hair, this could signal that the hair is becoming matted.

Another tremendous signal is the appearance of dullness or lack of motion, as raveled hair tends to lose its herbal shine and versatility.  Watching out for these symptoms will help you deal with matting problems before they get worse, ensuring your hair extensions live healthy and beautiful lives.

Preparation for Unmatting

Tools require

Acquiring the vital tools to ensure an easy and safe method is important to effectively inmate hair extensions at the base.

1. Wide-tooth comb or detangling brush

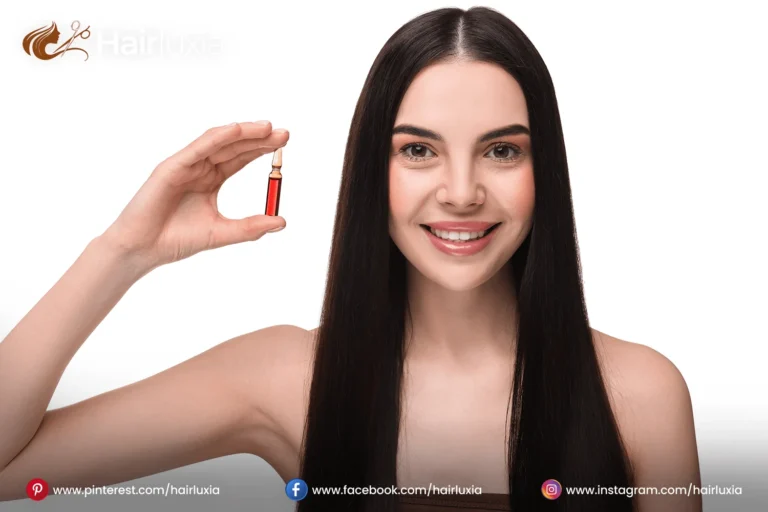
2. Leave-in conditioner or detangling spray

3. Hair oil or serum

4. Hair clips

5. Space requires

6. Towels or antique T-shirts to trap falling hair

Create a relaxing place

Creating a comfortable area for unmat hair extensions is essential to ensuring a clean and strain-free system. Start by deciding on a properly lit area. True lighting fixtures allow you to see any tangles or knots, making it less difficult to work through them without causing extra harm.

Consider investing in a comfortable chair or cushion where you can sit for an extended period without pain. Unmat hair extension Having a mirror close by will help you display your development and ensure you’re coping with the extensions carefully.

Additionally, preserve your gear, such as a huge-tooth comb, detangling spray, and clips, within easy attain to reduce needless actions. Unmat hair extension A calm environment can also decorate your attention, so consider playing soothing tunes or using aromatherapy to create relaxing surroundings.

Unmat hair extension A properly organized and snug workspace will contribute to a more powerful and exciting experience as you unmute your hair extensions at the foundation.

Step by-step guide to matte hair extension at the root

Section the Hair

Use hair clips to separate the messy segment from the relaxation of the hair.

Section the Hair

Apply Detangler

Generously spray or follow leave-in conditioner or detangling spray to the disheveled location.

Start Detangling from the Ends

Using a wide-enamel comb, start at the ends of the hair and lightly work your way as much as the roots.

Use Fingers for Gentle Separation

If the comb gets stuck, use your palms to separate the hairs, heading off excessively and pulling gently.

Be Patient

Emphasize taking breaks to avoid unfavorable extensions or your natural hair.

Final Brush and Clean-Up

Final Brush and Clean-Up

Once detangled, provide the hair with a final brush and clean any fallen hair.

Expert Tips for stopping future matting

  1. Brush each day the use of a huge teeth comb, starting from the ends
  2. Use sulfate-unfastened shampoo and wash extensions in a downward motion.
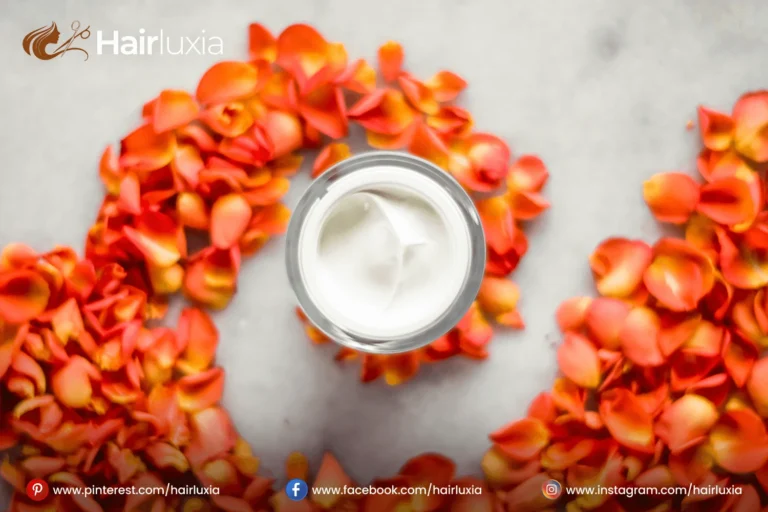
  3. Keep extensions moisturized with lightweight oils and serums.
  4. Never sleep with moist hair; continually dry it very well.
  5. Sleep on a silk pillowcase or put on a satin bonnet.
  6. Limit warmness styling and continually use a warmness protectant.
  7. Avoid product buildup with the aid of lightweight merchandise and clarifying shampoo.
  8. Protect extensions from chlorine and saltwater by rinsing immediately after swimming.
  9. Schedule regular upkeep appointments with an expert.
  10. Stay hydrated and keep hair-boosting supplements in mind.
  11. When searching for professional help

When matting on the roots becomes too much to control at home, seeking professional help is important.  If your efforts to detangle effectively make the situation worse, or if you notice continual knots and multiplied breakage, a stylist can step in to prevent similar damage.

They have the right gear and expertise to safely detangle your hair without harming the extensions or your herbal hair.  When unsure, seek advice from a professional to avoid irreversible damage.

Conclusion

Ultimately, Unmat hair extensions on the basis requires persistence, the right gear, and careful techniques to prevent damage to each of your extensions and herbal hair.  You may restore your hair’s smoothness and shine by recognizing the symptoms of matting early, getting ready for a comfortable workspace, and using gentle techniques.

Regular protection, right care, and following the outlined preventative suggestions permit you to avoid matting in the future.  However, if the matting becomes severe or unmanageable, seeking expert assistance is a sensible choice to ensure your hair remains healthy and beautiful.

FAQ’s

1. Can I use every day conditioner to detangle hair extensions?

While a normal conditioner can detangle hair extensions, a leave-in conditioner or dedicated detangling spray is preferable to prevent residue buildup that might weigh down or grease them.

2. How regularly should I wash my Unmat hair extensions?

You have to wash your hair extensions every 7 to 10 days, or as needed, to keep their exceptional without stripping moisture.

3. What products are excellent for preventing matting?

You can use a sulfate-free shampoo, leave-in conditioner, detangling spray, nourishing oil, deep conditioner, and heat protectant to prevent matting in hair extensions.

How to come to be a hair transplant technician

Best way to come to be a hair transplant technician

How to Come to Be a Hair Transplant Technician

Becoming a hair transplant technician is a fulfilling career. You combine medical skills with the art of hair repair. You work equal with surgeons on delicate procedures that restore confidence.

hair transplant technician

This job requires a careful eye for detail and precise technique. You’ll learn how to transplant hair follicles thoroughly. More people are choosing cosmetic and reconstructive surgery. This means there are more steady job opportunities. You can also help change lives.

Hair Transplantation

Hair transplantation is a medical procedure that involves transferring hair follicles from one part of the body, typically the lower back or sides of the scalp, to areas experiencing hair loss or thinning. As one of the most effective and permanent solutions for hair restoration, hair transplantation has advanced significantly over the years.

Recent innovations include minimally invasive techniques such as Follicular Unit Extraction (FUE) and Platelet-Rich Plasma (PRP) therapy, which improve results and reduce recovery times.

With an increasing number of clinics offering cutting-edge technology and personalized treatment plans, hair transplantation has become an increasingly popular option for individuals seeking to restore their confidence and hairline.

What is a Hair Transplant Technician?

Hair transplant technicians play a crucial role in hair restoration procedures by assisting surgeons in the precise extraction and implantation of hair follicles. They are skilled in various techniques designed to optimize hair transplant outcomes.

Follicular Unit Extraction (FUE)

FUE is a popular and gentle method for hair transplantation. It involves removing individual hair follicles directly from the scalp using a small tool. Here’s why FUE is a great choice:

  • Minimal Scaring: Leaves tiny scars that are hard to notice.
  • Quick Healing: Patients feel less pain and recover faster.
  • Natural Look: Creates a natural hairline that blends perfectly.

Follicular Unit Transplantation (FUT)

Follicular Unit Transplantation (FUT), also known as the strip method, involves removing a strip of skin from the donor area (usually the back of the scalp) to extract hair follicles. Key aspects of FUT include:

  • Higher Graft Yield: This method allows for harvesting a larger number of grafts in a single session, making it ideal for individuals with extensive hair loss.
  • Linear Scar: The procedure leaves a linear scar in the donor area, which can be noticeable if the hair is cut very short.
  • Cost-Effective: FUT is often more affordable than Follicular Unit Extraction (FUE), especially for cases requiring a large number of grafts.

Direct Hair Implantation (DHI)

Direct Hair Implantation (DHI)

Direct Hair Implantation (DHI) is an advanced technique derived from Follicular Unit Extraction (FUE). In this method, hair follicles are extracted and implanted simultaneously using a specialized tool known as a Choi pen. Key benefits of DHI include:

  • Enhanced Graft Survival: The direct implantation process minimizes the time follicles spend outside the body, improving their survival rate.
  • No Pre-Incision Required: Grafts are placed directly into the scalp without prior incisions, causing minimal trauma and promoting faster recovery.

Robotic Hair Transplantation

Robotic Hair Transplantation is a high-tech method that uses robotic systems to assist in the Follicular Unit Extraction (FUE) process. Key advantages include:

  • Precision: Robots provide enhanced accuracy during follicle extraction and placement.
  • Reduced Human Error: The use of robotic tools ensures consistent and repeatable results, minimizing the chance of mistakes.

Scalp Micropigmentation (SMP)

Although not a transplant technique, Scalp Micropigmentation (SMP) is often used alongside other hair restoration methods. It involves tattooing tiny dots on the scalp to simulate the appearance of hair follicles, creating the illusion of a fuller head of hair. Benefits include:

  • Non-Invasive: As no surgery is involved, it’s an ideal option for individuals looking for a quick solution.
  • Quick Procedure: The procedure is typically completed in just a few sessions.

Each of these methods has its unique benefits and considerations. The best choice depends on individual factors, including the extent of hair loss, scalp condition, and personal preferences. Hair transplant technician Consulting with a certified hair restoration specialist can help determine the most suitable method to achieve the desired results.

Hair Transplant Technician Skills

Becoming a successful hair transplant technician requires a combination of technical abilities, interpersonal skills, and specialized knowledge related to hair restoration. Key skills required for this role include:

Technical Skills

  • Surgical Proficiency: Understanding and performing various hair transplant techniques, including Follicular Unit Extraction (FUE) and Follicular Unit Transplantation (FUT).
  • Precision and Attention to Detail: Carefully extracting and implanting hair follicles to ensure natural-looking results while minimizing trauma to the scalp.
  • Knowledge of Anatomy: Familiarity with the anatomy of the scalp and hair follicles, including hair growth cycles and how to determine the best donor sites.
  • Suturing and Wound Care: Skills of suturing techniques (for FUT) and post-operative care to ensure proper healing and minimize scarring.
  • Equipment Handling: Proficiency in using specialized tools and equipment, including surgical instruments, microscopes, and graft storage solutions.

Interpersonal Skills| Hair Transplant Technician

  • Patient Communication: Effectively communicating with patients to explain the rationale behind procedures, set realistic expectations, and address concerns.
  • Empathy and Compassion: Understanding the emotional impact of hair loss and providing reassurance and support to patients throughout the process.
  • Team Collaboration: Working closely with surgeons, nurses, and other medical staff to ensure smooth and efficient procedures.

Problem-Solving Skills

  • Critical Thinking: Hair transplant technician Evaluating each patient’s unique goals and creating personalized treatment plans.
  • Adaptability: Adjusting techniques and approaches based on individual patient progress and responses during procedures.

Organizational Skills

  • Time Management: Effectively managing time during procedures to optimize patient flow and ensure thoroughness without rushing.
  • Record-Keeping: Maintaining accurate and detailed patient records, including medical histories, procedural notes, and follow-up care plans.

Continuous Learning

  • Staying Informed: Keeping up with the latest advancements in hair transplantation techniques, tools, and technology to provide the best care.
  • Participating in Training: Engaging in workshops, seminars, and certification courses to enhance skills and knowledge.

Career Opportunities with a Degree in Hair Transplant Technology

With a degree or specialized training as a hair transplant technician, numerous career opportunities are available in the field of hair restoration and related areas. Some potential career paths include:

Hair Transplant Technician

A degree in hair transplant technology opens up various career opportunities within the growing hair restoration industry. Hair transplant technicians assist surgeons during procedures, prepare grafts, and provide patient care and education.

Technicians typically work in clinics, hospitals, or specialized centers, collaborating closely with medical professionals. With the increasing demand for hair restoration, technicians can advance into roles such as clinic management, patient consultation, or training.

Hair Restoration Specialist

A degree as a Hair Restoration Specialist offers various career opportunities within the expanding field of hair restoration. Trained in techniques like Follicular Unit Extraction (FUE) and Follicular Unit Transplantation (FUT), specialists consult with patients, create treatment plans, and perform surgical procedures.

They typically work in clinics, dermatology offices, or plastic surgery centers. With the growing demand for hair restoration services, there are many opportunities for career advancement in this rewarding field.

Medical Aesthetician

A degree in Medical Aesthetics offers numerous career opportunities in skincare and beauty. Medical aestheticians work in dermatology clinics, plastic surgery offices, and medical spas, providing advanced treatments like facials, chemical peels, and laser therapies.

They also educate clients on skincare routines and maintenance. The medical environment emphasizes hygiene and patient care, while embracing the latest techniques. With the increasing demand for non-invasive beauty procedures, medical aestheticians can enjoy rewarding careers that combine technology, health, and beauty.

Cosmetic Surgeon Assistant

A degree as a Cosmetic Surgeon Assistant offers career opportunities in beauty and plastic surgery. These assistants support surgeons, manage patient care, and handle pre- and post-operative responsibilities. They work in fast-paced environments, including surgical centers and hospitals, assisting with consultations and ensuring equipment sterilization.

Strong communication skills are essential for educating patients about procedures. The demand for skilled beauty healthcare assistants is growing due to the increasing popularity of cosmetic procedures and a focus on patient safety.

Hair Restoration Consultant

A degree in Hair Restoration Consulting opens up career opportunities in the growing hair loss treatment field. hair transplant technician Consultants work in clinics, salons, or medical offices, assessing clients’ hair loss and recommending treatments such as hair transplants.

Their role includes conducting consultations, educating clients, and providing ongoing support. The professional and client-focused environment requires strong interpersonal skills and a deep understanding of restoration techniques, offering rewarding careers with significant growth potential as demand continues to rise.

Clinical Research Coordinator

A Clinical Research Coordinator (CRC) manages clinical trials, ensuring compliance with guidelines and ethical requirements. With a degree in medical research, CRCs recruit participants, collect data, and collaborate with investigators.

Clinical Research Coordinator

They work in hospitals, academic institutions, and research organizations, offering several career opportunities in clinical trial management and regulatory affairs. This role is ideal for those passionate about advancing scientific research and improving patient outcomes.

Educator or Trainer

A degree in Education or Training opens up several career opportunities as educators or trainers in schools, colleges, corporations, and community organizations. These professionals design and deliver educational content, assess performance, and adapt teaching methods to meet the needs of diverse learners.

Work environments range from traditional classrooms to corporate settings or online platforms, requiring strong communication and adaptability skills to engage and guide individuals effectively.

Entrepreneur

A degree in entrepreneurship offers diverse career paths for those looking to start businesses or work in emerging fields. Entrepreneurs can launch ventures in sectors like technology and retail, focusing on market strategies, business planning, investment, and operations.

They often mentor others and work in dynamic environments that require adaptability. Whether independently, in small teams, or large organizations, entrepreneurs foster a culture of innovation and creativity.

Degree Required to Be a Hair Transplant Technician

To become a hair transplant technician, specific educational requirements and certifications may vary depending on the region and employer. However, the following degrees and qualifications are generally beneficial:

1. Associate’s or Bachelor’s Degree

A degree in nursing, dermatology, or health sciences provides essential medical knowledge. It helps in understanding patient care and treatment procedures.

2. Cosmetology License

Some regions need a cosmetology or aesthetician license. This proves expertise in hair and skin care.

3. Specialized Training Programs

Many technicians complete training programs focused on hair restoration techniques. These include both surgical and non-surgical methods.

4. Certification

Getting certified by organizations like the American Board of Hair Restoration Surgery (ABHRS) boosts credibility and career opportunities.

5. Continuing Education

Staying updated with the latest hair restoration technologies is crucial. Ongoing education and advanced training help technicians stay competitive.

Note: Requirements may differ based on location. Always check the specific qualifications needed in your area.

Conclusion

A hair transplant technician with an entrepreneurship degree learns key business skills. They know how to start and manage a business. Entrepreneurs bring new ideas and adapt to market changes.

They also mentor others and help businesses grow. This boosts the economy. Whether running their own business or working for a company, they make a big impact. The market is always changing, and they help shape the future.

How to thicken up hair after extension

Best to thicken up hair after extension

How to Thicken Up Hair After Extension

After you’ve enjoyed the beauty and convenience of extensions, you might yourself wonder how to thicken up hair extensions. Thicken up hair after extension The back to your natural hair can be challenging, if extensions have caused your hair to feel thinner than before.

hair after extension

Adding hair extensions to your hair can completely transform your look by providing the long and full hair you’ve always wanted. Nevertheless, after the initial thrill fades, individuals may find that their hair’s natural state is having difficulty coping with the increased load.

Importance of Hair Thickness

Hair thickness is not just about looks but also it reflects the overall health of your hair. Healthier hair translates to better styling, fewer split ends, and more resilience against environmental damage.

It also influences hair health and manageability. Thicken up hair after extension can withstand daily stress from styling, environmental factors, and better than thinner hair. Additionally, thicker hair can give you a fuller, enhancing your overall appearance. If your hair feels sparse after removal or having extensions, it’s crucial to address this for better hair health.

Some gentle Hair-care practises to thicker your hair

Avoid Heat Damage: Avoid to use of heat styling tools alot in your hair. When you do use them, apply a heat protect spray to prevent damage.

Be Gentle When Washing: Use soft touch when shampooing and conditioning. Avoid aggressive rubbing, which can cause breakage.

Steer clear of shampoo with sulfate as it can dry out and harm your hair while also potentially stripping and dulling it.

Separate out with caution: Gently detangle damp hair with a wide-tooth comb or your fingers.

Do hair extension ruin your hair

Hair extensions have the potential to cause damage or ruin to your own hair, with the extent of the harm being influenced by the way they are put in, looked after, and taken out. Using incorrect methods or wearing them for extended periods can result in problems like hair breakage, thinning, or traction alopecia caused by too much pressure on the scalp. Using too much adhesive or clothing with tight weaves can cause hair follicles to become weaker.

Furthermore, failing to give appropriate care, such as applying moisturizer or shielding hair from heat, can exacerbate the harm. Nevertheless, if done by an expert and with appropriate caution, extensions can be worn without causing substantial damage to your real hair. Taking regular breaks and using high-quality products can reduce potential dangers.

Protecting Your Hair

Taking care of your hair is essential, particularly following extensions.

Reducing heat exposure is a great method to safeguard your hair. Ensure to utilize heat protectant sprays and choose air drying your hair as often as you can during the styling process.

It is more susceptible to damage when wet, therefore opt for a wide-tooth comb over a brush for gentle detangling. Use silk pillow or satin for sleep. They create less friction than cotton, helping prevent snagging while you rest. Limit sun exposure as UV rays can weaken strands over time. A stylish hat not only protects but also adds flair to any outfit.

Exploring Professional Options

If you’re not seeing the outcomes you want from your home endeavors, consider looking into professional alternatives. Hair experts and skin doctors can give personalized guidance according to your unique hair situation..

PRP therapy

PRP therapy

Platelet-Rich Plasma treatments, has become popular for promoting hair growth. You could explore various services provided at salons like deep conditioning or keratin treatments.

For more long-term solutions, consider discussing options like extensions made from higher quality materials or even transitioning techniques if you’re looking to change up styles altogether.

Do hair extension stop growing your hair

While extensions themselves do not stop the growth of hair directly, incorrect usage or maintenance can harm your real hair, resulting in the illusion of stunted hair growth. Heavy or improperly installed extensions can create scalp tension, which may result in breakage or thinning of hair. However, if you want to thicken up hair after extension, it’s crucial to choose high-quality extensions and ensure they are installed correctly.

Furthermore, failing to properly maintain your natural hair can lead to weakening over time. To thicken up hair after extension, you should follow a proper aftercare routine, including regular moisturizing, gentle detangling, and using nourishing hair products.

In order for your hair to stay healthy and grow well, it is important to purchase top-notch extensions, get them put in by a professional, and follow a consistent care routine for both the extensions and your natural hair. This will prevent any harm and promote the growth of your natural hair while enhancing its appearance with extensions. Additionally, if you aim to thicken up hair after extension, consider using strengthening treatments, deep conditioning masks, and scalp massages to boost circulation and encourage thickness.

Another key aspect to thicken up hair after extension is to avoid excessive heat styling or chemical treatments that may weaken the hair structure. Instead, opt for protective hairstyles and gentle handling to maintain the integrity of both your natural hair and the extensions.

By following these tips, you can successfully thicken up hair after extension while keeping your hair healthy, strong, and voluminous

Advantages and Disadvantages

Not taking proper care of hair extensions can result in harm to your own hair. Before using extensions, your hair could be healthy and strong, but eventually you might notice signs of damage like breaking, thinning, or brittleness

This may occur as a result of overexertion from bulky extensions, incorrect setup, or insufficient upkeep. Selecting high-quality extensions, getting them installed by a professional, and maintaining proper care are essential for reducing damage.

By approaching it correctly, you can reap the advantages of extensions and maintain the health of your natural hair.

How to renew hair extensions

renew hair extensions

Refreshing or maintaining hair extensions extends their lifespan and maintains their appearance at their best. If you want to thicken up hair after extension, begin by softly cleansing the extensions with a sulphate-free shampoo, then apply a hydrating conditioner to replenish softness and enhance luster. Refrain from using hot water as it may lead to tangling or causing harm.

Following washing, it is advisable to allow the extensions to dry on their own instead of applying heat, as it can cause damage to the hair. This step is essential, especially if you’re looking to thicken up hair after extension without causing unnecessary breakage. Look for loose clips on clip-in extensions and replace them as needed.

To maintain sewn-in or bonded extensions, it is crucial to schedule regular appointments with a professional for tightening, repositioning, or reinstalling when they start to become loose. Regular maintenance plays a key role in efforts to thicken up hair after extension, ensuring the hair remains voluminous and full. Cutting the tips may also eliminate split ends or fraying, which helps to thicken up hair after extension by keeping the ends looking fresh and healthy.

In conclusion, consistently using a wide-tooth comb while brushing will help maintain smooth and tangle-free extensions. This simple habit contributes to efforts to thicken up hair after extension, preventing unnecessary shedding and keeping the extensions looking thick and beautiful.

By adhering to these instructions, you can refresh your hair extensions and extend their lifespan while preserving their quality and appearance. Whether your goal is to maintain or thicken up hair after extension, following these care tips will help you achieve the best results.

Conclusion:

Proper care and maintenance are needed to thicken up hair after extension and prevent damaging your natural hair while enjoying the beauty and volume of hair extensions. For your hair to stay healthy and thick, make sure to use top-notch extensions, have them put in by a professional, and stick to a gentle hair-care regimen.

To thicken up hair after extension, it’s essential to prevent thinning and breakage by avoiding heat damage, using sulfate-free products, and being cautious with detangling. These steps ensure that your hair remains strong and voluminous even after removing the extensions.

If you see that your hair is in poor condition after getting extensions, seeking professional treatments and advice from experts can assist in returning its fullness and well-being. They can recommend the best methods to thicken up hair after extension, such as nourishing treatments, scalp massages, and strengthening hair masks.

By giving proper care and attention, you can thicken up hair after extension and wear extensions without harming the health of your natural hair. Remember that patience and the right hair-care routine are key factors in maintaining and improving your hair’s overall health.

Whether you’re looking to thicken up hair after extension or simply want to maintain its volume, following these steps will help you achieve strong, beautiful hair.

Commonly asked questions (Q&A)

1. Which vitamins are recommended for enhancing hair thickness?

Vitamin B, Vitamin C, plus Iron and Zinc are the best for thicken up hairs and also essential to improve their growth.

2. Can I wash my hair after extensions daily?

Don’t wash your hair with extensions more than twice a week, because it can make your hair dry and can cause damage to your extension also.

3. What are the signs that show the recovery of your hair?

Hair feels smoother with less frizz, showing balanced moisture and protein levels. Hair stretches and bounces back without breaking, indicates recovery.

4. Can I use heat styling tools after hair extensions?

Avoid using styling tools with extensions. Human hair extensions are able to tolerate heat, although extremely high temperatures may result in dryness, breakage, and fading of color.

how to hide clip in hair extensions

How to hide clip in hair extension

How to Hide Clip in Hair Extension

Clip in Hair Extensions are a famous preference for those who want to instantly add length and volume to their hair without the long-term commitment. They are an easy and versatile solution to enhance your hairstyle results. Whether you’re preparing for a special occasion or simply want to add a bit more glamour to your everyday look, Clip-in Hair Extensions can provide the perfect transformation.

However, one of the biggest challenges with Clip in Hair Extensions is ensuring they blend seamlessly with your natural hair. When applied correctly, Clip-ins allow you to enjoy a new, enhanced look without drawing attention to the extensions themselves. The key to achieving this is to carefully match the extensions to your hair color and texture, ensuring they look as natural as possible.

By following a few simple tips and tricks, you can master the art of blending Clip-in Hair Extensions and elevate your hairstyle with ease. Whether you’re looking for a subtle volume boost or dramatic length, Clip in Hair Extensions offer a quick and convenient way to transform your hair.

Hide clip in hair extensions

In this comprehensive guide, we’ll explore numerous techniques and pointers to help you how hide clip-in hair extensions, ensuring you sense confident and terrify even as rocking your luscious locks.

1. Start with the Right Clip-in Hair Extension

Before knowing the way to disguise clip in hair extensions, it’s vital to start with the proper products. Not all clip-ins are the same, and selecting the wrong ones can make it tough to blend them in together with your herbal hair. Picking notable extensions that fit your hair color and texture is crucial for reaching a continuing appearance.

Color Matching: The first step is choosing the proper shade. Many organizations provide distinct sunglasses, along with multi-tonal alternatives. If you cannot discover your specific shade, pick out one this is slightly darker than your herbal hair, as lighter shades may be more great if the extensions shift.

Texture: Make positive the texture of your clip-ins suits your herbal hair. For example, in case your hair is curly, the use of directly extensions could make it apparent that you’re carrying them.

Weight: If you’ve got exceptional hair, cross for lighter extensions. Heavier extensions can weigh your hair down and make it more difficult to combo in.

In fashionable, investing in awesome clip-ins that in shape your hair is important. If you’re uncertain, consulting a stylist allow you to discover the first-class suit in your hair type.

2. Section your Hair Nicely

One of the most essential steps in successfully hiding clip in extensions is the way you phase your hair. Proper sectioning not best offers the right base for attaching the extensions but also guarantees that they blend seamlessly with your natural hair.

  • Divide Your Hair Horizontally: Start by growing horizontal sections of your hair. Begin on the nape of your neck and use a comb or your palms to split a phase approximately an inch thick. This lower segment might be in which you attach the primary row of extensions. As you work your manner up, ensure to go away sufficient hair on top to cowl the clips once you’re finished.
  • Tease for Grip: Before clipping inside the extensions, it’s an excellent concept to tease the roots of the section you just created. To try this, take a satisfactory-teeth comb and lightly backcomb the hair on the roots. This provides texture and volume, which allows the clips grip better and live securely in vicinity in the course of the day. Teasing additionally creates a cushion that hides the clips greater efficaciously.
  • Repeat for Upper Sections: Continue sectioning your hair, operating your manner upward. Each segment should be about an inch thick, and do not forget to leave sufficient hair on pinnacle to cover the clips as you move. Aim for a layered effect, a good way to help create a extra natural look when you finish styling.
  • Use Hair Clips: As you segment off your hair, use small hair clips to preserve the upper layers out of the manner. This will make it simpler to attention at the decrease layers and save you any unintended tangling or blending.

By taking the time to segment your hair well, you lay the foundation for a perfect appearance that keeps your clip-in extensions hidden and stable.

3. Clip Placement

Extensions are simply as vital as how you place them. Even with perfect sectioning, the incorrect placement could make them noticeable.

  • Avoid Placing Clips Too Close to the Hairline: Make sure to depart about an inch or two of hair alongside the sides of your face. This offers you sufficient natural hair to cover the clips and mix the extensions.
  • Stagger the Clips: For an extra herbal, layered effect, stagger the location of your extensions. This means now not placing each row immediately above the preceding one but offsetting them barely to create a more blended appearance.
  • Double Up for Volume: In areas in which you want extra thickness, just like the lower back of your head, you can stack two wefts of clip-ins on top of every other. This provides volume without compromising on herbal look.

Clip Placement

4. Clip-In Hair Extension (Curls and Waves)

While it’s viable to wear clip-ins with instantly hair, curling or waving your hair is one of the easiest ways to hide them. The delivered texture makes it more difficult to distinguish between where your herbal hair ends and the extensions begin.

  • Curl Your Natural Hair and Extensions Together: After clipping in the extensions, use a curling iron or wand to twist your hair in conjunction with the extensions. This will combo the textures and create a cohesive appearance.
  • Opt for Loose Waves for a Subtle Look: Loose waves or beachy curls are best for a laid-back, herbal appearance. Tight curls, however, can occasionally display wherein the hair modifications from natural to extensions.
  • Heat Protection: Always bear in mind to use a warmness protectant before styling to prevent damage to both your natural hair and your extensions.

Another styling trick is to apply a blow-dryer after applying a mild mist of water to both your natural hair and the extensions. This helps the strands bind together, growing a extra seamless blend.

5. Backcombing To Get Extra Volume

If you’ve got pleasant hair, one of the quality techniques to cover clip in extensions is by using including greater quantity through backcombing, also referred to as teasing. This technique now not simplest facilitates hide the clips however additionally creates a fuller appearance that enhances your common hairstyle. Here’s how to successfully backcomb your hair for the satisfactory results:

  • Tease the Roots: Start by the use of a first-rate-tooth comb to softly backcomb the roots of your herbal hair, mainly in the regions in which the extensions might be clipped in. To try this, take a small section of hair and gently comb it downward toward the scalp. Be careful now not to pull too difficult to avoid damage. This teasing will create a cushion that allows hide the clips and makes them less major.
  • Focus at the Top Layers: Pay unique interest to backcombing the pinnacle layers of your hair. By including elevate to these sections, you create a barrier that certainly covers any clip-in wefts beneath. The greater extent you create on the top, the easier it turns into to hide the extensions.
  • Use Spray to add extent: For even extra lift and preserve, keep in mind making use of a volumizing spray to the roots before you start teasing. This product adds texture and grip, supporting the teased sections stay in region during the day. A fuller, extra textured appearance now not best conceals the clips but additionally enhances your hair’s universal frame and measurement.

Backcombing is an powerful way to combo your clip in extensions with high-quality hair, giving you a herbal and voluminous look at the same time as keeping the clips nicely-hidden.

6. Hair Accessories

Hair accessories no longer best elevates your ordinary look, but also allows to divert the enchantment out of your extension. And also makes your fashion extra eye-catching for everyone. Here are some hair add-ons alternatives to keep in mind

  • Headbands:  Clip in Hair Extension stylish headband worn simply below the crown can effortlessly cover clips across the top of your head. Choose ambitious colorings or intricate patterns to feature a elegant contact that complements your outfit. It’s a simple way to beautify your coiffure at the same time as keeping everything neatly in vicinity!
  • Scarves: You can wear a headscarf around your head to cover clip-in hair extension. Use for a colorful print or a smooth pastel coloration to present your look a unique aptitude. This flexible accent not best conceals clips but additionally brings an easy elegance to your ensemble, perfect for both informal outings and extra formal occasions.
  • Decorative Hair Clips: Adding a ornamental Clip in Hair Extension or barrette can remodel your hairstyle in an instantaneous. Whether you pick out a announcement piece with gems or a minimalist layout, these clips will draw attention faraway from your extensions and showcase your creativity. Plus, they’re a remarkable manner to express your non-public fashion!

By incorporating these elegant accessories, you can be playful and ingenious even as making sure your extensions remain beautifully hidden. So pass ahead, permit your creativeness run wild and flip your hair into a canvas of creativity!

7. Layering for Natural Blend

Layering is a critical step, specifically in case your extensions are longer or thicker than your herbal hair. If the extensions don’t fit your herbal haircut, it’s smooth to peer wherein your real hair ends and the extensions start.

  • Trim Extensions if Necessary: Take your extensions to a expert stylist to trim them into layers that fit your natural haircut. If carried out successfully, the extensions will mixture tons extra evidently along with your own hair.
  • Layer in Extensions Strategically: Clip in Hair Extension in the longest portions at the base and shorter pieces as you figure your manner up. This mimics natural hair increase and allows create a greater seamless combo.

Use some product to cover Clip in Hair Extension

product to cover clip-in extension

The proper merchandise can help make certain your clip-in extensions live placed and appearance natural all day.

  • Texturizing Spray: A light texturizing spray adds grip in your hair, making it less difficult to cover the clips. It also enables prevent your natural hair from searching too sleek, that can make the extensions stand out.
  • Hairspray: After styling, practice a robust-maintain hairspray to keep the whole thing in area, specifically in humid or windy conditions.

Hairstyles for Clip In Hair Extensions

If you’re involved about clips showing in completely down hairstyles, half of-up styles are an awesome alternative. They’re easy to do, and they naturally can hide the Clip in Hair Extension.

  • Half-Up Bun: Gather the top half of your hair right into a bun, securing it with a hair tie or clip. This fashion is mainly properly for hiding the pinnacle clips and leaving the bottom extensions loose to go with the flow.
  • Braided Half-Up Style: Incorporate small braids into the half of-up fashion to add texture while also hiding the extensions.

Final Test

Finally, Clip in Hair Extension usually give yourself as soon as-over in special lighting. While your Clip in Hair Extension would possibly look perfect indoors, shiny out of doors light can every so often reveal clips or choppy blends. Double-take a look at your hair from all angles in herbal mild to make certain your clip-ins remain invisible.

Conclusion

In conclusion, to hide Clip in Hair Extension involves a combination of choosing the right merchandise, right sectioning, and strategic styling techniques. Clip in Hair Extension From coloration matching and backcombing to the use of add-ons and layering, each step performs a critical function in attaining an unbroken mixture that enhances your standard appearance.

With those tips and hints, you can enjoy the instant quantity and period that Clip in Hair Extension offer, all at the same time as retaining a natural look. Clip in Hair Extension Remember to regularly examine your style in distinct lights to ensure your extensions stay discreet. With a touch practice and creativity, Clip in Hair Extension you’ll be able to rock your clip-ins with self-assurance, feeling fabulous every step of the manner!


&honey hair oil how to use

Best method how to use & honey hair oil

& Honey Hair Oil How to Use

A popular hair oil that has a lot of interest by the people is & honey hair oil. Hair oils have long been a traditional part of hair care procedures. Because & honey hair  oil is a natural excerpt of honey combined with  nutritional  ingredients, it’s the perfect choice for anybody looking to enhance shine, reduce  ringlet, and cinch in  humidity to their hair.

In this guide, we’ll discuss how to use &Honey Hair Oil effectively to transform your hair care routine and achieve salon-like results at home.

What’s & Honey Hair oil?

& honey hair oil is designed to give deep hydration and protection with the power of honey, royal jelly, and propolis. Its end to maintain humidity situations in your hair by creating a hedge that locks in hydration.

& honey hair oil

The unique mix of ingredients creates a hedge around each hair beachfront, locking in hydration and precluding humidity loss, which is particularly salutary for those with dry or damaged hair.

Eventually, & honey hair oil not only enhances the appearance of your hair by adding shine and reducing  ringlet but also contributes to long- term hair health by  furnishing essential aliment and protection.

How to Use & Honey Hair Oil

To use & honey hair oil effectively, follow these way.

1. Wet or Dry Hair: & Honey hair  oil works best when you put it on slightly wet hair, but it may also be used to dry hair to enhance smoothness and shine.

2. Apply a Little Quantum: Use one or two pumps to apply a small volume of oil on your hand. Adjust the volume according to the length and texture of your hair.

3. Warm the oil: To warm the oil, rub it between your triumphs. It spreads more unevenly as a result.

4. Apply to Hair Mid-lengths to Ends: The areas of your hair that are most vulnerable to blankness and damage are the mid-lengths and ends. – Avoid applying too close to the roots to help your hair from looking slithery.

How to apply &honey hair oil

5. Comb Through: Use a wide- tooth comb or your fritters to distribute the oil unevenly.

6. Style as Usual: Your hair may be blown dry, air dried, or nominated anyway you choose. The & honey hair oil adds buff, hydration, and helps to lessen ringlet.

7. Use as demanded: You may also dab a bitsy bit over dry hair to add further humidity or manage ringlet throughout the day.

Since you prefer using a bonnet teetotaler, you can apply the oil before using it to lock in  humidity and achieve smoother results.

Ingredients of & Honey Hair  Oil

Cyclopentasiloxane, Dimethicone, Hydrogenated polyisobutene, Palm  oil, Honey, Honey excerpt, Hydrolyzed honey protein, Damask rose flower excerpt, Argania spinosa kernel  oil, Panthenol, Gluconobacter/ honey fermented  result, Keratin(  hair), Royal jelly excerpt, Propolis excerpt, Coconut  oil, alkyl glucoside, Hyaluronic acid hydroxypropyltrimonium, Ceramide NG, Ceramide NP, Ceramide AP, Hydrolyzed silk, Glycerin, Tocopherol, Quaternium- 18, Quaternium-18, Quaternium-33, Pisaborol, Cholesterol, Butylene Glycol (BG), Propylene Glycol (PG), Phenoxyethanol, Water, and Fragrance are among the key ingredients.

Benefits of Using & Honey Hair oil

1. Deep Hydration

& Honey hair oil  contains honey, a natural ingredient known for its capability to soften and soothe hair. This indicates that it attracts humidity to your hair and seals it, maintaining the hydration of your beaches for extended ages.

It’s particularly profitable for dry or damaged hair, abetting in the revivification of wimpiness and smoothness.

2. Frizz Control

The oil smooths the hair cuticle, reducing curl, air, and flyaways. This results in your hair being easier to handle, giving it a satiny and polished appearance.

3. Heat Protection

When using heat styling tools like blow dryers, flat irons, or entwining irons, & honey hair oil acts as a defensive wall. It shields your hair from heat damage by covering your strands, minimizing breakage and split ends.

4. Adds Shine

One of the conspicuous benefits of & honey hair oil is the moment shine it adds to your hair. The feather light formula fleeces your beaches with a natural, healthy buff without making your hair look slithery.

5. Feather light and Non-Greasy

& honey hair oil has a feather light texture that absorbs snappily into the hair. This ensures your hair feels soft and silky without being counted down or slithery.

6. Nourishes and Strengthens Hair

The combination of honey, royal jelly, and propolis delivers essential nutrients that nourish and strengthen the hair, helping to reduce breakage and promote healthier overall hair growth.

7. Suitable for All Hair Types

Whether you have straight, crimpy, or curled hair, & honey hair oil works effectively across different hair textures. It can be used on both damp and dry hair, making it protean for all hair routines.

8. Smooth’s Split Ends

By hydrating and sealing the ends of your hair, & honey hair oil painting helps to minimize the appearance of split ends, making your hair look healthier and lower damaged.

9. Color- Safe

The gentle formula is safe for color- treated hair, helping to maintain sprightliness while furnishing humidity and protection.

& honey hair oil types

& honey hair oil types

& honey offers a range of hair oil products designed to feed to different hair requirements and preferences. Then are some common types of & honey hair in the market.

1. & honey Moisturizing Hair Oil

This type is specifically designed to give deep hydration and aliment to dry and damaged hair. It generally contains a mix of honey, royal jelly, and colorful nutritional benefits to restore humidity and enhance shine.

2. & honey Lightweight Hair Oil

A lighter interpretation designed for those with finer hair types or those who prefer anon-greasy sense. & honey hair oil offers hydration and protection without importing the hair down, making it ideal for everyday use.

3. & honey Repairing Hair oil

Targeted for damaged or chemically treated hair, this oil is amended with ingredients that help repair and strengthen hair filaments. It frequently includes fresh proteins or vitamins to prop in restoring health and vitality to the hair.

4. & honey curl Defining Hair oil

Specifically designed for curled hair, this oil helps enhance and define ringlets while furnishing humidity and reducing ringlet. It frequently includes ingredients that help maintain shape and plainness.

5. & honey Hair Growth Oil

Formulated with constituents known to promote hair growth and crown health, this type may include essential canvases and nutrients that stimulate the crown and encourage stronger hair growth.

6. & honey nutritional Hair oil

This oil focuses on furnishing violent aliment to the hair, frequently containing fresh botanical excerpts that help to condition and enhance overall hair health.

7. & honey Crown Treatment oil

Aimed at addressing crown issues like blankness or vexation, & honey hair oil contains soothing ingredients that help maintain a healthy hair, promoting hair growth and overall hair health.

8. & honey Heat Protection Oil

This type is designed to be used before heat styling, furnishing a defensive hedge against heat damage. It helps to shield hair from the dangerous goods of blow dryers, flat irons, and entwining wands.

Refills & honey hair oil

Refills for the honey hair oil give an eco-friendly and affordable option for individualities wanting to lessen waste and cut costs. These environmentally friendly packaging choices, generally set up in sacks or bigger bottles, enable you to refill your current hair oil vessel rather of copping a new bone.

Using refills allows you to save plutocrat and reduce plastic waste by reusing the original vessel.

Refills offer the added convenience of having a larger volume of your favored hair oil readily available, while conserving its high- quality formula and benefits for your hair. Make sure your vessel is clean and dry before pouring the oil from the cache poke or bottle.

Once you have sealed your vessel, keep it in a cool, dry position out of direct sun. Renewals of & honey hair oil painting are available at beauty force stores, online retailers, and the functionary & honey website.

Conclusion

In short, honey hair oil is a multipurpose, nutritional treatment that improves hair health by maintaining humidity, controlling ringlet, and boosting shine. Its unique mix of propolis, royal jelly, and honey hydrates hair deeply and securities it from heat and environmental detriment.

Honey hair oil painting is good for all hair types and textures. It helps keep color- treated hair vibrant, help split ends, and encourage healthy hair development.

This & honey hair oil offers an individualized result with several formulas for different hair types, ranging from feather light to restorative and coil- defining results. Refills also offer a provident and environmentally responsible system to keep reaping its advantages.

FAQ’s

Can I use & honey hair oil daily?

Yes, you can use it daily to maintain humidity, reduce  ringlet, and add shine. It can also be reapplied as  demanded throughout the day to control  ringlet or add hydration.

How important oil should I use?

Start with one or two pumps and acclimate according to your hair’s length, consistence, and texture. Finer hair may bear lower, while thicker or curled hair might  profit from  further product.

What are the benefits of using &honey hair oil?

The oil provides multiple benefits for healthier, more manageable hair. It moisturizes, control frizz, enhances shine, protects against heat damage, support hair, and repairs split ends, making it a versatile multipurpose solution.

Can I use &honey hair oil with other styling products?

Yes, &honey hair oil can be used alongside other styling products, such as mousse or gel, for added hydration and frizz control.

how to prevent pimples after facial hair removal

How to save you pimple after hair facial

Best To Save You Pimple After Hair Facial

Hair facials are a high-quality manner to renewal your scalp and promote wholesome hair boom, however they are able to on occasion lead to surprising breakouts. The oils, products and treatments used at some point of a hair facial may clog pores or aggravate sensitive skin, ensuing in pimple after hair facial.

Many individuals experience pimple after hair facial due to the heavy oils or product residue left on the skin. To avoid pimple after hair facial, ensure proper cleansing of your face and scalp after the treatment to remove any pore-clogging substances.

Pimple after hair facial

If you’re questioning how to save you pimples after a hair facial, this manual will help you recognize why they manifest and, greater importantly, how to keep away from them for clearer, more healthy skin. By following a few easy pointers, you can enjoy your hair facial without stressful approximately post-remedy breakouts.

Why Pimple Take Place After Hair Facial

Pimples can expand after a hair facial for numerous reasons, in the main due to the products and techniques used during the remedy. Here’s why:

Pore-Clogging Products

Some products like oil, conditioner, serums and other can come into touch with your pores and skin, particularly around the eyebrow and hairline, are commonly used in hair treatments. And these products can create a dynamic problem in the event that they incorporate heavy or comedogenic chemical compounds.

Oil Transfer

During a hair facial, your scalp and hair are treated with numerous oils and lotions. If those oils get transferred for your face via your palms, towels, or headbands, they can contribute to extra oil on the pores and skin, ensuing in clogged pores and zits.

Heat and Steam

Some hair facials include the usage of warmth or steam to open up the hair cuticles. While this could be splendid on your hair, the warmth can also cause your facial pores to open up, making it simpler for dust, oil, and product residue to settle into your pores, that may cause pimples.

Bacterial Transfer

Hairbrushes, combs, and towels used at some stage in the remedy can harbor bacteria, in particular if not cleaned nicely. When these gear come into contact along with your scalp and skin, bacteria can be transferred, main to pimples.

Touching Your Face

During a hair facial, you could by mistake contact your face, moving oils, product residue, and bacteria from your palms or hair in your pores and skin. This can easily clog pores and result in breakouts.

Blocked Hair Follicles (Folliculitis)

Sometimes, hair products can block hair follicles, main to folliculitis, which can appear to be small zits or acne alongside the hairline. This circumstance is regularly unsuitable for ordinary zits however is because of inflammation or contamination of the hair follicles.

Sensitive Skin Reaction

People with touchy or pimples-inclined pores and skin may additionally react to certain components utilized in hair treatments, ensuing in inflammation and infection that could manifest as pimples.

By information those reasons, you can take steps to minimize the risk of developing zits after a hair facial.

How to Choose the Proper Hair Facial in Your Skin Kind

Choosing the proper hair facial to your skin kind is vital for effective effects. For oily or acne-susceptible skin, choose oil-loose, gel-primarily based facials with salicylic acid or tea tree oil to save you breakouts and reduce the chances of getting a pimple after hair facial. Many individuals with sensitive skin often experience a pimple after hair facial, which is why it’s important to select gentle products that soothe rather than irritate.

Those with dry or touchy skin have to pick out hydrating facials featuring elements like hyaluronic acid or aloe vera for moisture without irritation. However, some may still notice a pimple after hair facial due to clogged pores or product residue. Ensuring a proper cleansing routine post-facial can help minimize the risk of a pimple after hair facial.

For aggregate pores and skin, look for remedies that balance oil and provide hydration, inclusive of clay masks. Avoid robust exfoliants or fragrances if you have reactive skin to prevent redness and potential concerns like a pimple after hair facial. Consulting a skincare professional allow you to locate the nice facial in your precise wishes while also guiding you on how to avoid a pimple after hair facial in the future.

Pre Facial Pores and Skin-Care Guidelines

Before getting a hair facial, it’s critical to prepare your pores and skin with the proper skincare ordinary to minimize the threat of breakouts. Hair facials regularly contain the use of oils, conditioners, and serums, that could without problems come into touch with your skin, main to clogged pores and acne.

1. Cleanse Thoroughly

Starting with a clean face guarantees that no dust, oil, or makeup mixes with hair products in the course of a facial, stopping clogged pores or irritation. Use a gentle cleaner in your pores and skin kind, specializing in areas close to the hairline to put off all residue and create a clean base for the treatment.

Cleanse thoroughly

2. Exfoliate lightly

Exfoliating earlier than a hair facial facilitates put off useless skin cells which can clog pores and result in pimples after hair facial, allowing your skin to breathe more without problems. To try this, use a slight exfoliator 24 to 48 hours earlier than the treatment. Avoid harsh scrubs, mainly if you have sensitive pores and skin, to save you irritation and reduce the risk of pimples after hair facial.

3. Avoid Heavy Skin Products

Using heavy or oil-based totally skincare merchandise earlier than a hair facial can clog pores once they mix with hair remedies. To save you this, opt for light-weight, oil-loose moisturizers and serums, mainly across the forehead and hairline. This will help preserve your skin clean whilst you experience your hair facial.

4. Stay Hydrated

Well-hydrated pores and skin can better tolerate the products and remedies used during a hair facial, minimizing the risk of irritation. To put together your pores and skin, drink masses of water in the days leading as much as the facial and practice a light, hydrating moisturizer in your face. This will make sure your pores and skin is in foremost condition for the treatment.

5. Tie or Clip Your Hair Away from the Face

To save you hair products from entering contact along with your skin, specially in breakout-prone regions like the brow and cheeks, it’s vital to steady your hair away from your face. Use a scarf or hair clips to keep strands clean, ensuring your skin remains covered even as applying your hair care merchandise.

6. Apply a Non Comedogenic Sunscreen

Before a hair facial, guard your skin from UV damage, that may increase sensitivity and result in breakouts. Apply a lightweight  sunscreen that gained ’t clog pores, specially near the hairline, to maintain your skin healthful and clear.

7. Avoid Applying Make-Up

Makeup can clog your pores, mainly whilst it mixes with hair products at some point of a hair facial remedy. To hold your pores clear and maximize the blessings of the facial, it’s satisfactory to pass makeup at the day of the remedy.

8. Use moderate toner

Using a toner is useful for balancing your skin’s pH tiers and tightening pores, that may assist limit product seepage. After cleaning your face, apply a mild, alcohol-free toner to keep hydration with out drying out your skin. This will assist maintain your pores clean and guide typical skin fitness.

9. Treat Pre-Present Zits

Before getting a facial, it’s critical to address any present pimples to avoid hectic them in the course of the treatment. To efficaciously control active acne, observe a spot treatment containing salicylic acid or benzoyl peroxide the night earlier than your facial.

This coaching helps to minimize ability flare. And ensures a smoother treatment revel in.

Post Care Remedy After Hair Facial

1.Gently Wash your Face

After a hair facial, cleanse your face to eliminate any oils or other ingredients that may have transferred on your pores and skin. Use a moderate, non-comedogenic cleaner, focusing on the areas near your hairline to assist prevent breakouts and keep your skin fresh.

2. Apply Toner

A toner plays a essential function in skin care by way of helping to balance the skin’s pH and soothe any inflammation that may rise up all through a facial. To attain the great benefits, opt for an alcohol-loose toner infused with calming substances including aloe vera or rose water. Simply follow the toner with a cotton pad to gently refresh and put together your skin for the following steps in your skincare routine.

3. Use a Moisturizer

Hydration is important for recuperation, however using heavy lotions can clog pores and cause breakouts. Instead, choose a lightweight, oil-loose moisturizer that provides the essential hydration without contributing excess oil. This method allows preserve wholesome skin whilst selling powerful recuperation.

4. Avoid Heavy Makeup

Makeup can aggravate the pores and skin and clog pores, especially following a remedy that leaves your skin touchy. To permit your pores and skin to respire and get better, it is important to offer it a destroy from make-up for at least 24 hours after a facial. This pause enables save you ability irritation and supports restoration.

5. Limit Sun Exposure

After a facial, your pores and skin can emerge as extra touchy to daylight, heightening the danger of inflammation and hyperpigmentation. To shield your skin whilst you want to go outside, it’s important to put on a wide-brimmed hat and apply a extensive-spectrum sunscreen. This will assist shield your pores and skin from dangerous UV rays and reduce any adverse results.

6. Stay Hydrated

Hydration is essential for skin healing and average health. To preserve highest quality hydration, it’s crucial to drink plenty of water at some stage in the day. Additionally, using a hydrating face mist can provide a refreshing raise, retaining your pores and skin feeling revitalized and replenished.

7. Avoid Sweating and Warm Bathe

Heat and sweat can get worse infection and make a contribution to breakouts, so it’s important to take precautions after a facial. To limit those consequences, keep away from excessive workout routines, saunas, and hot showers for the first 24 hours post-treatment. This will help make certain your skin remains calm and promotes better effects from the facial.

8. Use Gentle Products

After a hair facial, it’s vital to keep in mind the skin care products you operate, as harsh elements can aggravate your pores and skin. Pimple breakouts can sometimes occur if the wrong products are used, so it’s essential to choose wisely.

To promote restoration and maintain your skin’s stability, opt for perfume-unfastened and mild skincare merchandise which can be less possibly to cause irritation. This approach facilitates ensure your skin stays calm and nourished after the treatment.

Additionally, keeping your skin clean and moisturized helps prevent pimple formation post-treatment, allowing you to enjoy a smooth and healthy complexion.

9. Monitor your Pores and Skin Reaction

Monitoring your pores and skin is essential for early detection of any potential problems. By checking for signs of irritation or breakouts in the days following a new skincare recurring, you may make timely changes to better suit your pores and skin’s needs.

How to Treat Pimples if They Occur After a Hair Facial

If you expand pimple after hair facial, cope with them speedy to save you similarly irritation. Keep your fingers off your face to avoid moving bacteria and oils. Gently cleanse the location with a slight, non-comedogenic cleanser, then follow a centered spot remedy with salicylic acid or benzoyl peroxide to lessen inflammation.

Using a calming gel with aloe vera can assist calm redness. Avoid heavy makeup and thick creams, opting for a light skincare habitual till the pimples heal. If breakouts persist or worsen, seek advice from a dermatologist for personalized advice.

Best Products to Use During Hair Facials to Avoid Pimples

Products to Use During Hair Facials to Avoid Pimples

Gentle Cleansers: Opt for sulfate-free shampoos that cleanse with out stripping herbal oils. Look for hydrating substances like aloe vera.

Exfoliating Scrubs: Use gentle scalp scrubs containing herbal exfoliants like sugar or salt to cast off dead skin cells without aggravating the scalp.

Purifying Masks: Clay or charcoal masks help take in greater oil and impurities. Choose ones with non-comedogenic elements.

Lightweight Conditioners: Select conditioners that hydrate with out clogging pores. Avoid heavy oils; as an opportunity, attempt products with lightweight silicones or botanical extracts.

Non-Comedogenic Oils: If the usage of hair oils, pick non-comedogenic options like jojoba or argan oil that nourish with out inflicting breakouts.

Scalp Treatments: Incorporate scalp treatments with tea tree oil or salicylic acid to prevent zits while offering anti-inflammatory benefits.

Post-Facial Products: After a facial, use a soothing serum or light moisturizer that gained’t clog pores, along with those with hyaluronic acid or chamomile.

By choosing the right products, you may enjoy your hair facials even as minimizing the danger of breakouts.

Conclusion

Even as hair facials offer remarkable advantages for your hair and scalp, they are able to cause pimple after hair facial if not finished cautiously. By understanding the causes of post-facial acne and taking preventive measures—such as selecting the right products for your skin type, following a proper pre- and post-care routine, and maintaining hygiene—you can minimize the risk of pimple after hair facial.

One of the main reasons people experience pimple after hair facial is due to clogged pores from heavy oils or products used during the treatment. Ensuring that you cleanse your face thoroughly can help reduce the likelihood of pimple after hair facial. It’s essential to opt for non-comedogenic products and avoid excessive touching of the face after your treatment, as this can further contribute to pimple after hair facial.

Moreover, hydration plays a crucial role in preventing pimple after hair facial. Always use a lightweight, hydrating moisturizer suited to your skin type. If you notice pimple after hair facial, treat it gently with soothing ingredients like aloe vera or salicylic acid. Harsh scrubbing can exacerbate the issue, leading to prolonged breakouts.

In the end, while hair facials offer incredible benefits, they can sometimes lead to pimple after hair facial if not done correctly. With proper care, product selection, and hygiene, you can enjoy the rejuvenating effects of a hair facial without the concern of pimple after hair facial.

How to keep dog hair from going down to the drain

How to keep dog hair from going down to the drain

Dealing with dog hair may be an assignment, specifically whilst it starts off evolved to clog your drains at some point of tub time. Keeping dog hair from occurring the drain isn’t best important for preserving a clean tool however also for stopping high priced renovation within the destiny.

In this guide, we are going to discover a few smooth and powerful strategies that will help you to save dog hair buildup on your drains, ensuring a trouble-free grooming habitual and a cleaner domestic environment.

dog hair from going down the drain

Why dog hair clog in drain

Dog hair can effects clog drains because it’s made from tiny strands that tangle together and create blockages. When you wash your dog, free hair is washed down the drain, wherein it tends to paste cleansing soap scum, dust, and different particles already within the pipes.

Over time, this combination forms a thick mass that restricts water go with the flow and ultimately reasons a complete blockage. Unlike human hair, dog hair may be extra vulnerable to sticking in the pipes due to its coarser texture and higher amount. This makes it a commonplace offender for drain clogs in domestic dog-quality families.

How to keep dog hair from going down the drain

Use a Drain Hair Catcher

One of the simplest and handiest strategies to prevent canine hair from clogging your drain is by using way of using a drain hair catcher. These mesh or silicone gadgets in form over or internal your drain and lure hair at the identical time as permitting water to go with the flow thru. Look for a model specifically designed for puppy hair, as the ones frequently have finer mesh to trap smaller particles.

Popular Choices:

TubShroom Pet Edition

Designed specifically for domestic dog hair, the TubShroom suits inside the drain and catches hair earlier than it reasons any issues.

OXO Good Grips Drain Protector

A reliable alternative for flat drains, this protector has a silicone rim that stays securely in area.

Brush Your Dog Before Bathing

Brushing your dog before tub time is every other powerful manner to lessen the quantity of hair that ends up in the drain. Regular grooming gets rid of loose fur, especially all through dropping season, and prevents it from taking location the drain throughout a bath.

Best Brushes for Shedding

FURminator deShedding Tool: This tool is extraordinary for doing away with unfastened undercoat hair, decreasing losing via as much as 90%.

SleekEZ Grooming Tool: A exquisite desire for brief-haired puppies, this tool effectively gets rid of unfastened fur without pulling or tense the pores and skin.

Rinse Your Dog in a Tub with a Hair Trap

If you often shower your canine in your tub, keep in mind the usage of a hair lure or bath liner that collects hair as you rinse. Some bath tubs include included hair catchers, however if not, a smooth mesh lure that sits over the drain will artwork wonders.

Dog in a Tub with a Hair Trap

Use a Washable Mat or Towel

Place a washer-friendly rubber mat or towel at the bottom of your bathtub to entice hair for the duration of your dog’s bathtub. Afterward, you can really eliminate the mat or towel, shake out the excess hair, and launder it. This method prevents hair from ever conducting the drain and permits preserve your bath easy.

Regular Drain Maintenance

It’s vital to preserve your drains frequently to save you hair buildup over time. Even with preventive measures, small quantities of canine hair can slip thru the cracks. To keep your drains in proper shape:

Flush the Drain: After every bath, run warm water flush the drain to push any closing hair or particles from the pipes.

Use a Drain Cleaner: Every few weeks, recall the use of an enzyme-primarily based drain cleanser that breaks down natural rely like hair without destructive your pipes.

Bathe Your Dog Outside When Possible

If the weather allows, giving your dog a bathtub outdoor may be a terrific manner to keep away from the drain problem altogether. You can use a transportable canine washing station or simply shower your canine the usage of a hose. Just ensure you’re in a place in which the runoff obtained purpose any troubles.

Consider a Professional Groomer

While grooming at home is handy, regular visits to a expert groomer can lessen the quantity of losing in your property and, with the useful resource of extension, in your drain. Groomers have specialized equipment and shampoos to control immoderate hair and may supply your canine a deep easy without the danger of clogging your pipes.

What to do if drain is already clogged

If your drain is already clogged with hair or other particles, there are some effective steps you could take to clear it:

Use a Drain Snake or Hair Removal Tool

A drain snake or a hair elimination tool, like a plastic hook, is an low value and smooth-to-use preference. Simply insert it into the drain and pull up any hair or gunk blocking the water waft.

Boiling Water

Boil a pot of water and slowly pour it down the clogged drain. The heat water can destroy down cleaning soap scum and dissolve greasy construct-up that can be contributing to the blockage.

Baking Soda and Vinegar

Create a natural cleaning solution through pouring half of cup of baking soda down the drain followed via half cup of vinegar. Let the aggregate sit for approximately 30 minutes to an hour. Then, flush the drain with boiling water to clear any last debris.

Plunger

If the blockage is deep and stubborn, using a plunger can be powerful. Fill the sink or bathtub with sufficient water to cover the plunger, then plunge vigorously to loosen the clog.

Chemical Drain Cleaner

If natural techniques do now not work, you may use a chemical drain cleanser. However, this need to be a last motel as those products may be harsh to your pipes and the surroundings. Follow the instructions cautiously.

Call a Professional

If now not one of the above strategies artwork or if the clog keeps returning, it is time to name a plumber. An expert can observe the state of affairs and can want to use greater superior gear, collectively with hydro-jetting, to easy the blockage.

Call a professional

Taking movement early can help prevent large plumbing issues in the future.

Conclusion

In end, preventing canine hair from going down the drain is essential for maintaining a healthful plumbing tool and avoiding steeply-priced protection. Simple steps like using a drain hair catcher, brushing your dog earlier than bathing, and normal drain protection can make a large distinction in preserving your pipes clean.

For extra stubborn clogs, domestic treatments including boiling water or baking soda and vinegar can help, but while unsure, don’t hesitate to call a professional plumber. With those tips, you can make sure that bath time stays pressure-free, every for you and your dog!

Frequently Asked Questions

1. Does something dissolve canine hair?

No, there isn’t a safe chemical that absolutely dissolves canine hair. The super method is to bodily do away with it using device like drain strainers or hair catchers.

2. How to now not clog drain with canine hair?

To prevent dog hair from clogging the drain, use a drain strainer or hair catcher at some point of baths. Brush your canine before bathing to lessen free hair. After the bath, eliminate any seen hair from the drain to keep away from buildup.

3. Is it bad for dog hair to move down the drain?

Yes, canine hair can clog your drain through the years, leading to plumbing troubles. It’s fine to hold it from going down the drain to avoid blockages.

4. What I can use in place of dog wash?

You can use a slight, unscented infant shampoo or a gentle, sulfate-unfastened human shampoo as an alternative for dog wash in a pinch. Just make certain to rinse thoroughly to keep away from any residue on your canine’s skin.

how to get extension tape residue out of hair

Best way to get extension tape residue out of hair

How to get extension tape residue out of hair

Removing extension tape residue from your hair can be a tricky mission, but with the right strategies and tools, you could do it without inflicting harm. Extension tapes are designed to paste firmly for your hair, making the removal procedure tough if no longer achieved properly.

extension tape residue

In this manual, we’ll explore effective techniques to securely eliminate extension tape residue, repair the smoothness of your hair, and preserve it looking healthy and residue-unfastened. Whether you are the usage of oil-based removers, natural solutions, or specialized products, those guidelines will assist you obtain a clean result.

Hair extension remover

Hair extension remover is a specially formulated product designed to safely and efficiently dissolve the adhesive used in hair extensions, making it less difficult to put off them without unfavorable your herbal hair. It is generally used for putting off tape-in, bonded, and stuck extensions.

Here’s a whole facts of what you want to know approximately hair extension remover:

Types of hair extension remover

Oil-based remover

Oil-based totally removers are most of the maximum commonplace and mild alternatives for both hair and scalp. They often contain components like coconut oil, olive oil, or argan oil, which paintings to break down adhesive by means of penetrating the glue and loosening the bonds without drying out the hair.

In addition to efficiently putting off tape residue, these removers also go away the hair moisturized, making them especially useful for people with dry or broken hair.

Alcohol-primarily based remover

Alcohol-based removers are recognized for their short action and are generally used by specialists. These removers typically include components like isopropyl alcohol, which efficiently dissolves adhesive on contact.

While they work quicker than oil-based totally alternatives, they can also be drying to both the hair and scalp. To counter this, it’s crucial to observe up with a deep conditioning treatment to restore moisture and maintain hair health.

Dual-segment remover

An aggregate of both oil and alcohol-based formulas gives the quality of both worlds with the aid of providing fast adhesive breakdown while minimizing harm or dryness to the hair. This makes them best for people with more sensitive scalps or hair this is liable to breakage.

How to apply hair extension remover

Preparation

To make certain a clean and efficient application technique, it’s beneficial to segment your hair. This not best makes the task greater attainable but additionally allows for more particular utility. Additionally, it’s important to protect your garb and surfaces, as a few removers may also stain fabrics.

Application

To remove adhesive bonds from extensions, along with tape-in or keratin bonds, apply the remover directly to the affected areas. If you’re using an oil-primarily based remover, lightly massage the product into the adhesive and permit it take a seat for a few minutes to efficiently loosen the bonds.

In comparison, alcohol-based totally removers work greater speedy, as the absorption normally starts elaborate to interrupt down within seconds after apply.

Removing the extension

Once the adhesive has been loosened, lightly slide the extensions out of your hair. It can be useful to apply a extensive-enamel comb or your arms to help on this process. Be cautious not to pull or pull on the extensions, as this will result in hair breakage.

Cleaning and washing

After getting rid of the extensions, it’s crucial to apply a clarifying shampoo to remove any ultimate residue from the adhesive and the remover product. This step ensures that your hair is unfastened from buildup and prepares it for the following section of care.

Following the clarifying shampoo, observe a deep conditioning remedy or hair mask to restore moisture and nourishment for your hair. This will assist keep its fitness and softness after the elimination technique.

Residue tape in extension without remover

Hair residue remover refers to products especially designed to do away with construct-up and residue from hair care products, oils, dirt, and other impurities. This construct-up can depart hair feeling heavy, greasy, or dull and may intervene with styling merchandise and remedies.

Types of Hair Residue Removers

Natural residue remover

Many human beings choose natural solutions for removing residue from their hair, turning to substances like apple cider vinegar, baking soda, or lemon juice. These herbal options can be diluted with water and used as a rinse to assist clarify the hair.

Not best are they powerful, but they’re also much less harsh than commercial products, making them gentler on each the hair and scalp.

Clarifying shampoos

Clarifying shampoos are specifically formulated to deeply cleanse each the hair and scalp via correctly casting off product build-up, extra oil, and impurities. These shampoos usually comprise stronger surfactants, which includes sodium lauryl sulfate (SLS) or ammonium lauryl sulfate, which assist strip away residue.

They are best to be used each few weeks, particularly for individuals who regularly use multiple hair products, as this facilitates maintain the hair’s fitness and freshness.

Scalp scrubs

Scalp exfoliation products are mainly designed to eliminate useless pores and skin cells and product residue from the scalp, selling healthful hair boom. These merchandise normally consist of bodily exfoliants, along with sugar or salt, in addition to chemical exfoliants like salicylic acid, which paintings to unclog hair follicles.

When used alongside everyday shampooing, scalp scrubs can appreciably beautify scalp health and cleanliness, ensuring a better environment for hair to thrive.

Dry shampoo remover

Dry shampoo remover

Specialized products designed to take away the construct-up from dry shampoo successfully refresh the hair and scalp without the want for water. These merchandise normally comprise powders or sprays that soak up excess oil and residue, often greater with extra cleansing retailers.

To use them, truly observe the product to the scalp and hair, then comply with up with thorough brushing to put off any remaining residue, leaving your hair looking smooth and revitalized.

How to use hair residue remover

Choose the right product

Applying Clarifying Shampoo calls for absolutely washing your hair, using a beneficent amount, and massaging it into your hair and scalp. To help it penetrate through the residue, permit it sit for a couple of minutes after giving it a radical rinse.

Scalp Scrub: Massage into the scalp with circular motions after applying to wet hair.

Dry Shampoo Remover: Spray or sprinkle the product onto the scalp and hair, permit it take a seat down for a minute, then brush via to eliminate more residue.

Follow up care

Using clarifying shampoos or scrubs each few weeks or as wanted is crucial, especially counting on how a fantastic deal product you use to your hair. However, it’s important to strike a balance, as overusing those merchandise can cause dryness.

After using a residue remover, it’s crucial to conform with up with a moisturizing conditioner or hair masks. This step enables restore hydration for your hair, preventing dryness and keeping its health.

How to do away with tape extension glue from hair at domestic

Removing tape extension glue from your hair at home may be performed thoroughly and successfully with a few clean techniques. Here’s a step-with the aid of-step guide that will help you deal with this sticky state of affairs without adverse your hair.

1. Gather Your Supplies

Before you begin, make sure you’ve got these ingredients:

  1. Natural oil (olive oil, coconut oil, or almond oil)
  2. Conditioner
  3. Heat source (blow dryer or flat iron)
  4. Fine-tooth comb
  5. Cotton balls or pads
  6. Baking soda (optionally available)
  7. Towel for cleanup

2. Use Natural Oil

Natural oils are awesome for breaking down adhesive with out harming your hair.

How to Use:

Warm the Oil: Slightly heat the oil on your palms or in a small bowl.

Apply to Residue: Generously study the oil to the regions with glue.

Massage: Gently rubdown the oil into the residue and allow it sit down for 10-15 mins.

Comb It Out: Use a super-enamel comb to cautiously dispose of the softened glue. Start from the ends and work your way as much as keep away from tugging for your hair.

3. Heat Method

Heat can assist loosen the glue, making it less complicated to get rid of.

How to Use:

Prepare Your Hair: Ensure your hair is dry earlier than using heat.

Use a Blow Dryer: On a low warm temperature placing, maintain the blow dryer some inches a ways from the glued vicinity for about 1-2 mins.

Apply Oil: While the vicinity is heat, exercise natural oil as cited above.

Comb: After a few minutes, gently comb out the residue.

4. Conditioner Application

Conditioner can help melt the glue, making it less complicated to take away.

How to Use:

Apply Conditioner: Generously comply with a thick layer of conditioner to the sticky regions.

Let It Sit: Allow the conditioner to penetrate for approximately 15-20 mins.

Gently Scrape: Use your arms or a high-quality-enamel comb to gently scrape off the softened glue.

5. Baking Soda Paste (Optional)

Baking soda may be an powerful exfoliant to assist improve residue.

How to Use:

Make the Paste: Mix 1 tablespoon of baking soda with a small quantity of water to shape a paste.

Apply to Residue: Spread the paste over the glued location.

Let It Sit: Allow it to sit for approximately 10 minutes.

Rinse and Comb: Rinse thoroughly with water and then use a super-enamel comb to take away any closing glue.

6. Rinse and Clean Up

Rinse and Clean Up

After you’ve eliminated the glue:

Wash Your Hair: Use a gentle shampoo to cleanse your hair and dispose of any remaining oils or any other products.

Deep Condition: Follow up with a deep conditioner to restore moisture and hydration for your hair.

Removing tape extension glue at home is completely viable with herbal oils, warm temperature, and a few gentle care. By following those steps, you can successfully do away with the residue whilst keeping your hair healthy and searching exquisite.

Common mistakes that people make while removing extension out of hair

Here are a few not unusual mistakes human beings make at the same time as removing extensions from hair:

1. Pulling Too Hard: Pulling the extensions can motive hair breakage and damage.

2. Skipping the Prep: Not the use of a detangling spray or oil can cause tangles and knots.

3. Ignoring the Removal Method: Using the incorrect technique for the particular type of extension can bring about hair damage.

4. Rushing the Process: Hurrying the removal can motive unnecessary strain on the hair.

5. Neglecting to Section Hair: Failing to phase off hair nicely could make the technique chaotic and growth the chance of damage.

6. Not Consulting a Professional: Attempting to eliminate extensions without expert help can cause errors and harm to natural hair.

7. Overusing Heat: Using immoderate warmness tools can weaken hair and extensions during elimination.

8. Skipping Aftercare: Not following up with a proper hair care ordinary can result in dryness and breakage after elimination.

Conclusion

Removing extension tape residue from hair calls for care and the right strategies to avoid damage. Whether choosing specialized hair extension removers, natural oils, or DIY strategies, it is critical to approach the system thoughtfully.

Always put together your hair via sectioning it and the usage of the precise products, and take a while to softly loosen the adhesive. Avoid commonplace errors inclusive of rushing the manner or the use of excessive warmth, as those can result in hair breakage and harm.

After correctly eliminating the residue, a right cleaning and conditioning routine is important to restore moisture and keep hair fitness. By following these hints, you may make sure a secure and effective removal manner, leaving your hair smooth, healthy, and residue-unfastened.

Tsubaki hair mask how to use

HOW TO APPLY TSUBAKI HAIR MASK

Tsubaki Hair Mask, one of the initial Japanese product that provides all what your hair is looking for. Owning hair that goes silky, hydrated, shiny, and healthy as one has ever imagined are owned if the application of Tsubaki Hair Mask goes within one’s head.

Read on as we get to know our step-by-step guide on how to use the Tsubaki Hair Mask so you could be able to have a salon-quality result right in the confines of your home.

Tsubaki hair mask

Tsubaki Hair Mask

The product has the name derived from the Tsubaki flower- whose oil, for decades has been treasured in Japan as one that possessed amazing properties that would moisturize and heal hair.

That nourishing treatment from Japan, the Tsubaki hair mask belongs to the Shiseido Tsubaki line. Using this product can revive even dry, damaged, and/or dull hair to be soft, shiny, and easy to handle.

Some ingredients of Tsubaki Hair Mask

Water, Glycerin, Dimethicone, IsopentylDiol, Hydrogenated Rapeseed Oil, Alcohol, BehenTrimonium Chloride, Stearyl Alcohol, Sorbitol, Aminopropyl Dimethicone, Hydroxyethyl Urea, Alkyl(C12,14) Oxy Hydroxypropyl Arginine HCl, Ali Trimonium Chloride, Lactic Acid, Camellia Seed Oil, (Phytosteryl/Octyldodecyl) Lauroyl Glutamate, Lysine Dilauroylglutamate Na, Royal Jelly Extract, Na Acetyl Hyaluronate, Hydrolyzed Conchiolin, Isopropanol, Cetanol, Octyldodecanol, Ethanol, Citric Acid, Ammonium Lactate, Bg, Dpg, Amp, Amodimethicone, Ppg-2-Deis-12, Tocopherol, Phenoxyethanol, Na Benzoate, Fragrance, Red 227, Yellow 4.

How to Apply Tsubaki Hair Mask?

Using Tsubaki Hair Mask is pretty easy through our how-to guide on the usage. With this, you’ll get salon-like results in your hair within the comfort of using it at home.

Shampoo: You need to wash the scalp with shampoo prior to getting some hair mask applied upon your scalp. It’s just because you are going to remove the dust particles, or oily spots plus dirt particles from your scalp to achieve impressive results with the Tsubaki hair mask.

Let out extra water: Now you are going to let out extra water from your hair. But you do not have to dry hair completely. Do not rub your hair aggressively to let out extra water from your scalp because friction causes damage at your hair cuticles.

Apply Mask: Apply a patch test to the hair to find out if it’s an allergic reaction. Once you feel like water isn’t dripping off your hair anymore, you’re all set to apply the hair mask on your hair  (about 9g for shoulder-length hair).

Application: Mid-length to the hair ends. Avoid applying it to the scalp as it will make your scalp greasy.

Rinse the Mask: Rinse the mask out thoroughly with lukewarm water till your hair feels clean and residue-free. You don’t have to sit with this mask for long, nor do you necessarily have to wait for the complete mixture to come off. So after applying the mask you can rinse the mask from your hair but in case your hair is much damaged then you may leave it for 5 to 10 minutes.

Rinse the mask

Conditioner: Once you have rinsed off all the Tsubaki Hair Mask on your hair, let it be exposed to conditioner so that it can replenish the moisture in your hair. Then you will have shine, smoothness, and thickness on your hair.

Recommendation: Apply the hair mask Tsubaki hair Mask 1 to 2 times a week according to the need of your hair. You have to wash the scalp with shampoo while you are applying any hair mask to your scalp. All the dust, oily, or other dirt particle gets removed, and good results can be achieved with the Tsubaki hair mask.

Who should apply Tsubaki Hair Mask?

Now that you feel that your hair needs more care than what it is being treated to, then this is the best time that you must treat your hair with this elegant treatment through the use of Tsubaki Hair Mask. The best remedy for someone whose hair has become damaged, dry, and frizzy that is Tsubaki Hair Mask. Now let’s see to whom Tsubaki Hair Mask may be suitably added for its course.

For all of you who, with dryness and irritation from overheated styling and chemical treatments, side effects of environmental damage, will be thrilled about the best magical remedy ever, especially designed to help repair, hydrate, and make your hair smooth, silky, and shiny. Suitable for dry or damaged hair.

With the story of a frizzy and unruly hair, have you ever gotten tired of fighting it? Tsubaki Hair Mask solves the control problem of frizz and is very easy to manage since it will seal cuticle and brighten shine. Dryness is the problem, it’s a no-brainer for you should ever want to get manageable and sleek hair.

Color treated hair, of course, needs special care to be healthy and full of life. Gradual coloring of chemicals creates a slow buildup that makes affected hair become dry and frizzy and breakable. Tsubaki Hair Mask can revive moisture for the sealing of color-longevity and fortifying your hair with every use. And it is when color lasts for long because it makes hair feel richly shiny.

For that person seeking even smoother and shinier hair: Who does not feel the excitement when the hairs get smoother and shinier even if still not dry or considerably damaged? This is one of the best hair masks, which falls in the Tsubaki Hair Mask to help bring hair to be spectacular for this added shine and moisture boost. It must be used either in curing your hair or making it presentable for any big event. You’d then feel how radiant and silky it feels on your hair.

For the luxury hair care enthusiast, self-care begins by taking good care of oneself. So, try out the Tsubaki Hair Mask and have that spa experience right from your home, but this time, absorbed very quickly to save you those extra hours on your part. Provide TLC to your hair and experience the amazing results rolling in as you give it that treatment-like some rather indulgent hairdresser getting all related benefits.

Results after applying Tsubaki hair mask

Some Expert Guidelines to Apply Tsubaki Hair Mask

Use on small portion first: Apply the Mask first on a small portion for you to test its effect in case you react adversely.

On wet hair: after washing and drying of the hair, apply on hair which is damply wet so that it has maximum bonding.

Use in slight amount: whatever applied on hair goes a long way, start by using a small dollop and change according to the length of your hair.

Ends oriented: These will be applied on mid-lengths and ends and not on the scalp so too much oil.

2 times a week: It should be included in your daily routine 1-2 times a week for perfect results.

Deep cleanse: Its washing with cool or lukewarm water is going to give you silky hair.

Conclusion

Tsubaki Hair Mask is strictly a classy and highly potent treatment against the problematic hair, particularly that poor frizzy and dry, damaged hair. Being a distinct formula from the Tsubaki flower, the product feeds and moistures hair so that hair then becomes easier to handle, shiny, or even glimmer.

That can be salon-quality quality when hair is frizzy, color-treated, or needs special attention. Use it 1-2 times a week. That’s how simple and easy to use, smooth, healthy-looking hair is yours if you follow the application instructions and make proper use of all the useful tips given.

FAQ’s

1. What kind of hair is Tsubaki Hair Mask for?

Tsubaki Hair Mask can be applied to dry, damaged, frizzy, and unmanageable, with climatic changes, colored-treatment hair.

2. Can I leave the Tsubaki Hair Mask in my hair?

You do not need to keep it sitting in your hair. You could just apply it for a little while and then wash out hair.

3. On Wet or Dry hair is better for Hair Mask use?

One should not wear hair mask when wet and not when dry either. Wearing hair masks when your hair is damp will enable it to absorb fully and penetrate deep into your hair.

how to use latanoprose for hair growth

How to use latanoprost for hair growth

Latanoprost, initially advanced as a remedy for glaucoma, has received attention for its capability to sell hair boom, specially in human beings experiencing hair thinning or loss. As a prostaglandin analog, Latanoprost works with the useful resource of extending the boom segment of the hair growth cycle, main to thicker and fuller hair.

 latanoprost for hair growth

In this article, we will discover a manner to efficaciously use Latanoprost for hair increase, which includes software strategies, dosage suggestions, and critical worries to make certain secure and last effects. If you wants to beautify your hair’s quantity or fight thinning, know-how how to use Latanoprost assist you to make knowledgeable picks approximately your hair care recurring.

How it works

By information how Latanoprost works on a cellular degree, we can discover its capability as a solution for those in search of to regain their hair. Latanoprost works with the useful resource of growing the dimensions and extensive form of hair follicles in some unspecified time in the future of the boom section of the hair cycle. It complements the hair boom process thru several mechanisms:

  • Prostaglandin Action: Latanoprost mimics the movement of herbal prostaglandins, which might be worried in hair growth regulation.
  • Increased Blood Flow: It promotes vasodilation, perfecting blood move to the hair follicles, imparting them with similarly nutrients and oxygen.
  • Follicular Activation: Latanoprost may also additionally stimulate dormant hair follicles, predominant to the increase of new hair.

Why it’s far used

Latanoprost is used for hair growth for many times.

  • Effective for Androgenetic Alopecia: It is specially beneficial for the ones experiencing male or woman sample baldness.
  • Enhances Eyelash Growth: Typically recommended to reinforce eyelash length, density, and color.
  • Non-Surgical Alternative: Provides a non-intrusive choice in place of opting for hair transplants or other surgical methods. 

Who can use latanoprost

Latanoprost is generally used by individuals experiencing hair thinning or hair loss, in particular people with situations like androgenic alopecia (male or female pattern baldness). While it became in the beginning designed for treating glaucoma, its side impact of promoting hair increase has made it well-known in off-label use for this purpose.

Anyone thinking about Latanoprost for hair boom want to discuss with a healthcare professional, as its effectiveness and safety may also moreover range based on individual fitness situations, medicinal pills, and hair loss reasons.

It’s normally secure for adults however need to be used carefully by the use of people with touchy pores and skin or underlying medical situations. Pregnant or breastfeeding girls are recommended to avoid the use of Latanoprost with out clinical supervision.

How to apply latanoprost for hair growth

apply latanoprost for hair growth

Latanoprost works by way of using prolonging the anagen (increase) phase of the hair cycle. Hair grows in cycles: the anagen section is even as the hair actively grows, and the longer this section lasts, the longer and thicker the hair can end up. By making use of Latanoprost topically, it enables stimulate the hair follicles to keep producing hair for a extra extended period.

How to use

1. Consult a physician first

Before the use of Latanoprost for hair increase, it’s vital to are seeking recommendation from a healthcare provider. While it’s mainly used for eye situations, using it off-label for hair may moreover have risks or facet outcomes.

2. Choose the area to apply

Latanoprost is frequently used for precise regions like eyelashes, eyebrows, or small patches of thinning scalp hair. If you’re focused on areas similar to the scalp, it is quality to use it to smaller, localized spots in preference to the entire scalp.

3. Clean the vicinity

Before making use of Latanoprost to your hair’s scalp or eyelashes, it is vital to make sure the area is smooth and dry, in that you wants to exercise to maximize the absorption and effectiveness of the treatment. Proper coaching can help lessen the danger of infection and save you the buildup of dirt or product residue.

4. Application approach

Use the applicator furnished with the medicine (or a small dropper if using an off-label answer) to use Latanoprost. Only a tiny drop is needed for small regions, such as the eyebrows or thinning patches at the scalp.

  • For eyelash boom: Use an applicator brush or a clean finger to use a small amount to the bottom of the eyelashes.
  • For scalp hair growth: Apply straight away to the thinning areas of the scalp using a dropper or applicator.

5.Wash your hand

Always wash your hands thoroughly with cleansing soap and water earlier than and after making use of Latanoprost to prevent infection and make certain right hygiene. This lets in avoid product transfer to accidental regions, reduces the risk of contamination, and keeps the product free from bacteria.

6. Avoid contact with unwanted areas

Be cautious at the same time as applying Latanoprost, as it could stimulate hair boom in accidental areas if it spreads. Make positive to wipe away any extra solution proper away.

7. Avoid rubbing

Avoid rubbing or wiping the place after utilizing Latanoprost. Let the product take in naturally to make certain its effectiveness and save you it from spreading to unintentional areas.

8. Be steady

For extremely good consequences, Latanoprost must be carried out always, usually as soon as a day (generally at night). It can also additionally take severa weeks or months to phrase seen improvements in hair growth.

9. Monitor for facet effect

Common facet outcomes embody eye contamination, redness, or darkening of the pores and skin around the vicinity in which it’s applied.

If you’re the use of it at the scalp, a few human beings file local pores and pores and skin infection. Report any unusual signs and symptoms on your health practitioner.

Tips to use Latanoprost for hair growth

When the usage of Latanoprost for hair boom, following unique guidelines can beautify its effectiveness and limit capability component outcomes. Here are some essential recommendations to preserve in thoughts whilst the usage of Latanoprost that will help you maximize its blessings for hair boom.

  • Consult a healthcare expert earlier than beginning Latanoprost.
  • Follow the prescribed dosage and alertness frequency.
  • Apply to easy, dry pores and skin for higher absorption.
  • Be constant collectively along with your application ordinary.
  • Use a dropper or applicator for specific targeting.
  • Avoid touching your eyes during utility.
  • Wash your fingers very well in advance than and after use.
  • Monitor for anything outcomes and seek advice from your health practitioner if desired.
  • Be affected character, as results may additionally additionally take sever weeks to seem.
  • Maintain a wholesome life-style to assist normal hair fitness.

Pros and cons of Latanoprost for Hair Growth

When allowing about Latanoprost for hair increase, it’s essential to weigh its capability advantages and downsides. As an off- marker remedy, Latanoprost has validated pledge in stimulating hair increase, substantially for the bones passing thinning hair or eyelash improvement.

Still, like each remedy, it comes with its non-public set of professionals and cons that must be cautiously estimated to decide if it’s the proper occasion for you. Here are some key factors to recall:

Pros of Latanoprost for Hair Growth

  • Promotes Hair Growth: Effective in stimulating new hair increase, particularly for those with androgenetic alopecia.
  • Easy Application: Simple to use as a topical remedy, each to the scalp or eyelashes.

Easy application

  • Minimal Side Effects: Generally properly-tolerated with moderate issue benefits in comparison to different treatments.

Cons of Latanoprost for Hair Growth

  • Off-Label Use: Not officially authorised for hair growth, which can also improve troubles about efficacy and protection.
  • Time-Consuming: Requires consistent each day software program, and outcomes also can take weeks to months to seem.
  • Possible Side Effects: May motive infection, dryness, or undesirable hair growth in areas not meant for treatment.

Who must keep away from Latanoprost for Hair Growth

The protection of Latanoprost for hair growth all through being pregnant or breastfeeding is not nicely-studied, so it is first-class to keep away from its use besides popular with the aid of a health practitioner. Additionally, people with touchy pores and skin need to workout caution, as a records of skin inflammation or allergies may additionally lead to undesirable facet outcomes along with redness or discomfort.

Furthermore, in view that Latanoprost is regularly an eye medication, human beings with a records of extreme eye situations should use it cautiously to save you functionality complications. Always are searching for recommendation from a healthcare expert earlier than beginning any new remedy to make certain it’s far appropriate to your unique state of affairs.

Conclusion

Latanoprost, to start with developed for glaucoma, indicates promise in selling hair increase, specially for those experiencing thinning or androgenetic alopecia. By extending the natural boom section of the hair cycle, it enhances follicular hobby and blood waft to the scalp, ensuing in thicker hair.

However, it’s miles crucial to are trying to find recommendation from a healthcare professional earlier than use to make certain safety and effectiveness. Following right utility strategies and maintaining consistency is top to carrying out desired effects. By using Latanoprost responsibly, you may take vast steps in the direction of healthier, fuller hair.

FAQ’s

1. Does Latanoprost make you sleepy?

Latanoprost is not diagnosed to cause drowsiness or sleepiness as a commonplace side effect. However, man or woman reactions may additionally variety, so if you enjoy unusual fatigue, seek advice from your healthcare corporation.

2. Can Latanoprost regrowth hair?

Yes, Latanoprost can promote hair regrowth, specifically in human beings with thinning hair or androgenetic alopecia, with the useful resource of extending the hair increase segment. Results range, so seek advice from a healthcare expert in advance than use.

3. What are the thing results of Latanoprost?

Side consequences encompass eye infection, redness, pores and skin darkening, and close by infection on the scalp. Unwanted hair growth in distinct areas may additionally stand up. Consult a physician for any worries.

4.    Is Latanoprost like Latisse?

Yes, Latanoprost and Latisse each comprise Latanoprost, which promotes hair boom. Latisse is mainly widely wide-spread for eyelash enhancement, whilst Latanoprost is specially used for glaucoma and rancid-label hair boom.

5.    What is the time effect of Latanoprost?

Latanoprost normally takes several weeks to months of regular use to show substantial outcomes in hair increase. Users may additionally start to see improvements inside 8 to 12 weeks, but advanced outcomes can take up to 6 months or longer, depending on man or woman response and adherence to the utility habitual.